Organizing events like conferences, workshops, or classes can feel overwhelming, but WpEvently, a powerful WordPress plugin with WooCommerce integration, makes it easy, fast, and organized. Whether you’re a beginner or a seasoned event planner, WpEvently’s intuitive interface, free features, and premium add-ons simplify ticketing, attendee management, and event promotion. This step-by-step guide walks you through installing WpEvently, setting up key features like calendars, ticketing, and RSVPs, and customizing it for various events, helping you create successful events in 2025 with minimal hassle.
Why WpEvently Is Perfect for Beginners
WpEvently reduces barriers for new users with its user-friendly design and robust functionality. According to a 2024 Eventbrite report, 78% of organizers prioritize integrated ticketing solutions, and WpEvently delivers this through WooCommerce compatibility. With over 9,000 active installations and a 4.6-star rating, it’s trusted for its ease of use and features like:
- Seamless Installation: Quick setup on any WordPress site.
- Free Features: Supports calendars, ticketing, and basic RSVPs out of the box.
- Customization: Offers templates and shortcodes for tailored event pages.
- Responsive Design: Ensures events look great on all devices.
This guide will help you leverage these features to launch your event effortlessly.
Find out more in Why WordPress is the best platform for Event Management.
Step-by-Step Guide to Getting Started with WpEvently
Follow these steps to set up WpEvently and start managing your events like a pro.
1. Install and Activate WpEvently
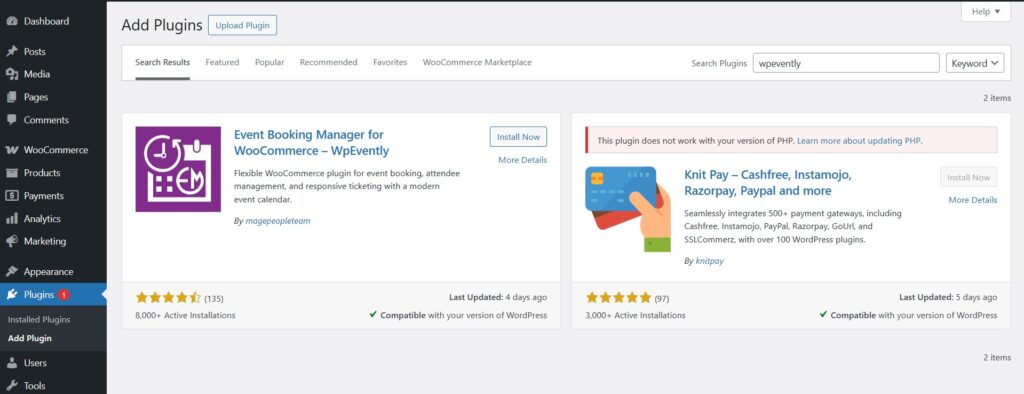
- Download the Plugin: Visit magepeople to download the free version of WpEvently.
- Install via WordPress: In your WordPress dashboard, go to Plugins > Add New, upload the WpEvently ZIP file, or search for “WpEvently” and click Install Now.
- Activate the Plugin: Click Activate to enable WpEvently. Ensure WooCommerce is installed and activated, as it’s required for ticketing.
- Configure Settings: Navigate to WpEvently Settings in the dashboard to set currency, default event categories, and Google Maps API key for venue display.
Pro Tip: Test compatibility with your theme (e.g., Elementor, Divi) to ensure no design conflicts, as WpEvently works with standards-compliant themes.
2. Set Up Event Features
WpEvently offers powerful features to manage calendars, ticketing, and RSVPs. Here’s how to configure them:
- Ticketing:
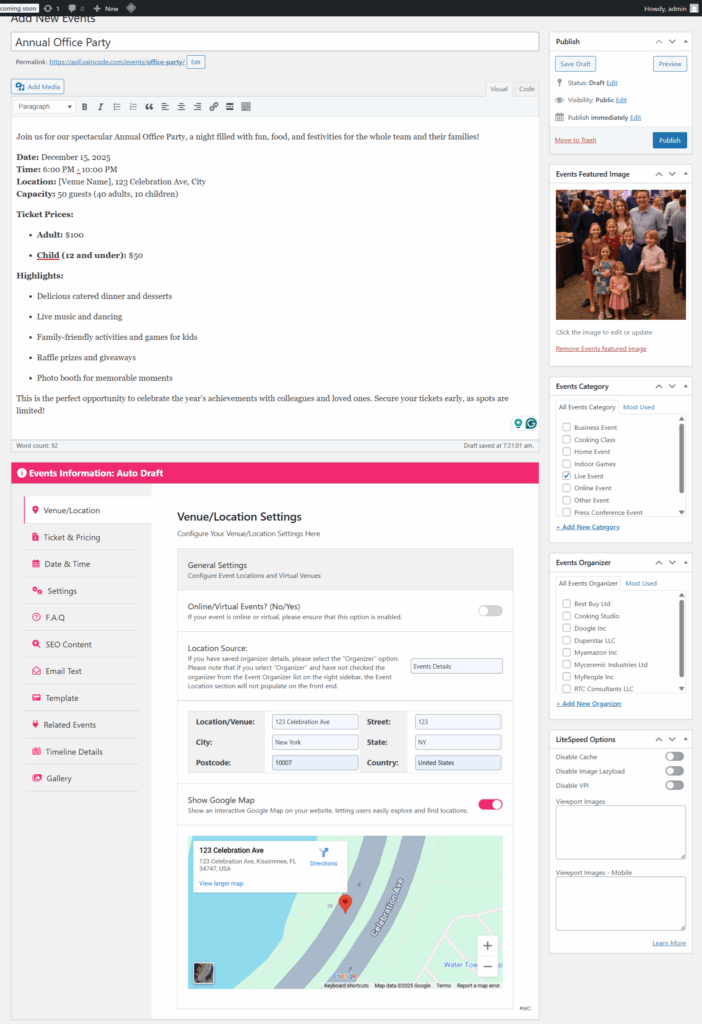
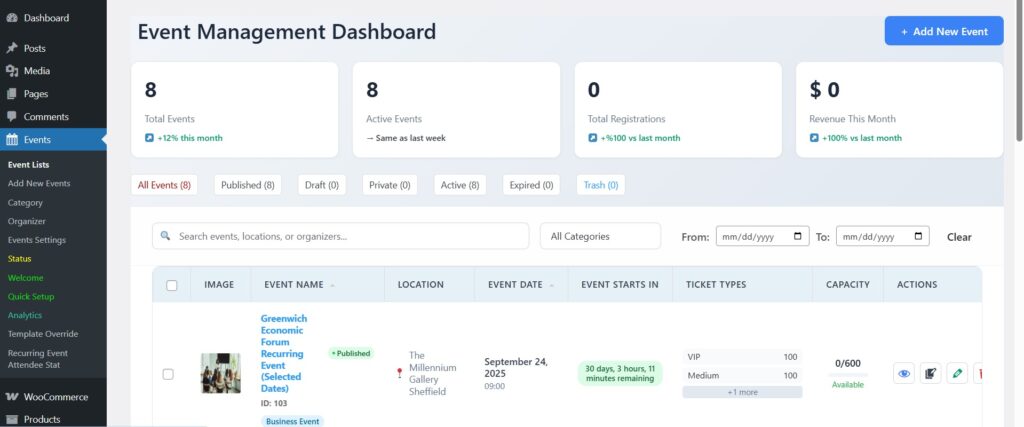
- In the dashboard, go to Events > Add New Event. Add event details (name, description, venue) and enable WooCommerce Ticketing.
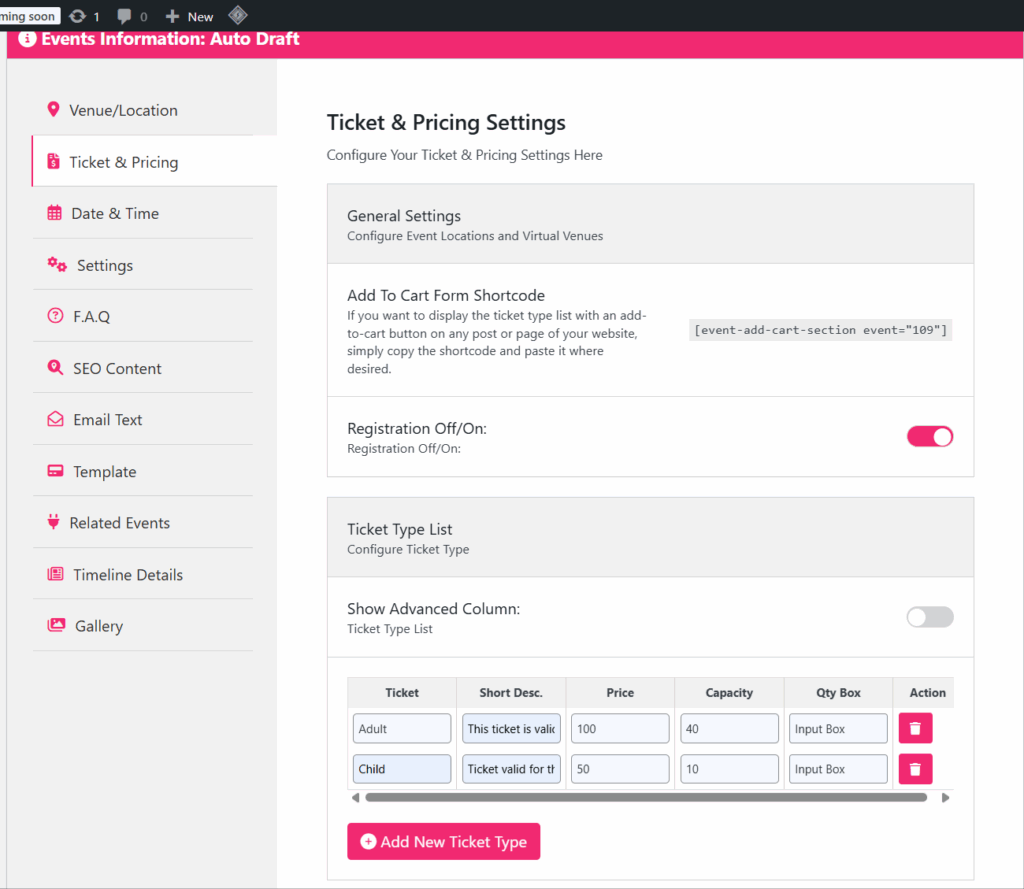
- Create multiple ticket types (e.g., Adult, Child) with custom prices and quantities. Set low stock notifications to manage inventory.
- With the Pro version, enable PDF ticket generation to send tickets via email upon purchase, with an option for single-ticket mode for group orders.
- Example: For a conference, offer “Early Bird” and “VIP” tickets with different pricing.
- RSVPs (Registration Forms):
- Use the Pro version’s custom registration form to collect attendee details (e.g., name, email, preferences). Add conditional logic, like showing “School Name” for Child tickets.
- Create global attendee forms to reuse across multiple events, saving time for recurring workshops.
- Example: For a cooking class, collect food allergy info via a custom form.
To get WpEvently Pro, check out WordPress Event Manager Plugin for WooCommerce at MagePeople.
- Publish Event:
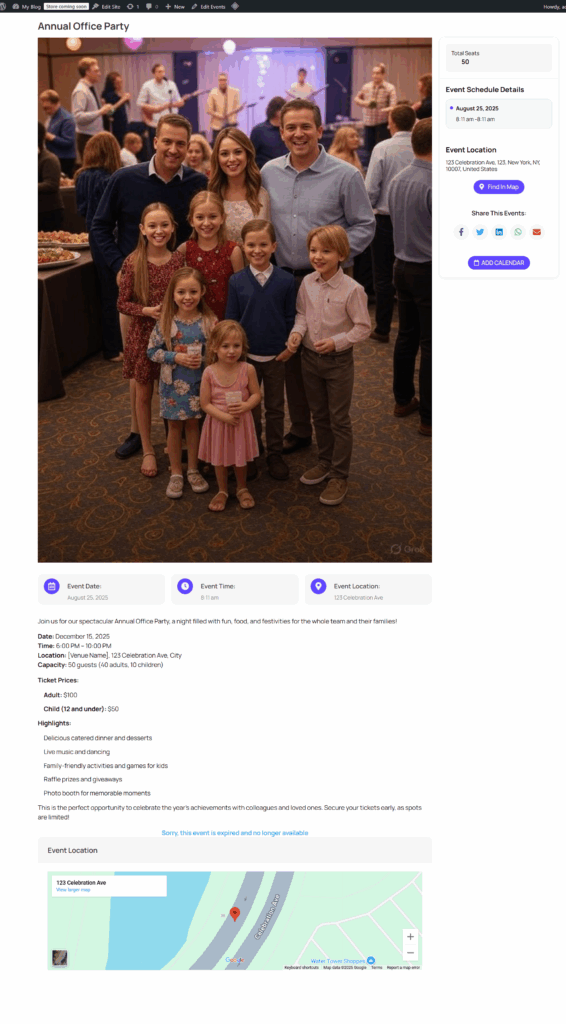
- Click Publish on the right
- Check your Event booking front end.
- Event Calendar:
- Create a calendar to display upcoming events. Use the shortcode [event-list style='grid'] to embed a grid-style calendar on any page or post.
- Customize the calendar with the Event Calendar Addon (bundled with Pro) to add images and detailed event info for a professional look.
- Example: For a workshop series, display a monthly calendar showing all session dates.
If you want to add a calendar in your event website, check out how to add a calendar to your WordPress event website.
3. Customize WpEvently for Different Events
WpEvently’s flexibility makes it ideal for various event types. Here’s how to tailor it for specific events:
- Conferences:
- Template: Use the Grid or Timeline template for a professional look. Add a shortcode like [event-list style='grid' show='10'] to display sessions.
- Features: Enable multi-date selection for multi-day events and use the Event QR Code Addon ($149) for mobile check-ins.
- Promotion: Add Event schema to boost SEO and AI visibility, ensuring your conference appears in Google’s Knowledge Panels.
If you want to make a seminar or conference using WpEvently plugin, check out how to make a seminar booking system.
- Workshops:
- Template: Choose the List or Minimal template for a clean, focused design. Use [event-list style='list'] for a simple workshop list.
- Features: Set up recurring events (daily/weekly) for ongoing classes. Use the Event Duplicator Addon ($20) to reuse workshop setups.
- Promotion: Share on LinkedIn with a post like “Join Our Weekly Workshops with WpEvently” to drive registrations.
- Festivals or Community Events:
- Template: Use the Grid template with vibrant images. Embed with [event-list style='grid' pagination='yes'] for large event lists.
- Features: Enable the Event Waitlist Addon (bundled) for sold-out events and the Event Seat Plan Addon (bundled) for assigned seating.
- Promotion: Use multilingual support (WPML, Polylang) to attract international attendees.
4. Manage and Promote Your Event
- Attendee Management: Use the Pro version’s Event Attendee Dashboard to view, filter, and edit attendee details. Export data in CSV format or send bulk email updates with custom templates.
- Sales Tracking: The Pro version provides event-wise sales reports to monitor ticket sales and revenue.
- Promotion: Embed event lists using shortcodes (e.g., [event-list cat='conference']) on your blog or homepage. Add FAQ schema to answer queries like “How to buy tickets for [[event]]?” for AI visibility.
Example Shortcode: [event-list style='grid' show='10' pagination='yes'] displays a paginated grid of up to 10 events.
WpEvently Free vs. Pro Features
| Feature | Free Version | Pro Version |
|---|---|---|
| Event Creation | Basic templates, recurring events | Advanced templates, multi-date selection |
| Ticketing | WooCommerce integration | PDF tickets, single-ticket mode |
| Registration Forms | Basic fields | Custom forms with conditional logic |
| Attendee Management | Basic dashboard | Detailed dashboard, CSV export, bulk edits |
| Email Notifications | Manual emails | Automatic emails with custom templates |
| Sales Reports | Not available | Event-wise sales reports |
Pricing: Free version for basic needs; Pro starts at $75/year or $149 lifetime for a single domain.
WpEvently Add-Ons for Enhanced Functionality
Extend WpEvently’s capabilities with these premium add-ons:
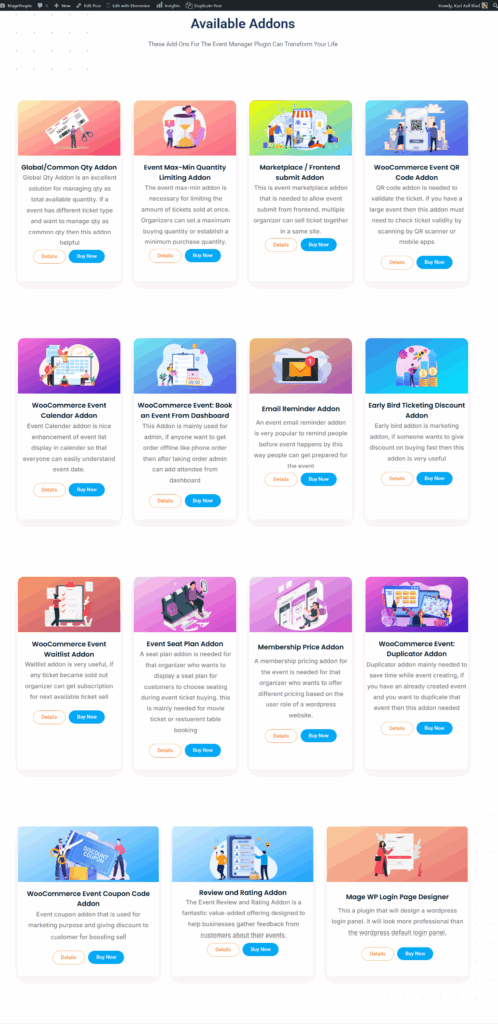
- Event QR Code ($149): Adds QR codes to tickets for mobile validation.
- Event Calendar (Bundled): Enhances calendar displays with images and details.
- Advanced Coupon Code (Bundled): Creates coupons based on ticket types/quantities.
- Event Waitlist (Bundled): Manages sold-out events with waitlist forms.
- Event Duplicator ($20): Reuses event setups for recurring events.
- Event Book from Dashboard (Bundled): Enables admin-panel ticket purchases.
- Event Membership Pricing (Bundled): Sets member-specific ticket prices.
- Event Max-Min Quantity Limiting ($149): Limits ticket purchases per person.
- Event Global Qty ($149): Manages common ticket quantities across events.
- Event Seat Plan (Bundled): Maps seats with flexible pricing.
- Frontend Event Submit (Bundled): Allows organizers to submit events via WooCommerce.
FAQs
How easy is it to install WpEvently?
WpEvently installs in minutes via the WordPress dashboard, with no coding required, and works with any standards-compliant theme.
Can WpEvently handle ticketing for workshops?
Yes, WpEvently’s WooCommerce integration supports multiple ticket types and recurring events, perfect for workshops.
Does WpEvently support global events?
Absolutely, it supports all WooCommerce payment gateways and multilingual plugins for international audiences.
Final Words
WpEvently makes event management accessible for beginners, with easy installation, powerful features like calendars, ticketing, and RSVPs, and customization for conferences, workshops, or festivals. Its free version covers the basics, while the Pro version and add-ons unlock advanced tools like PDF tickets and QR code check-ins.
Start your event journey at wpevently.com and create unforgettable events in 2025 with WpEvently’s SEO-friendly, AI-optimized platform!